

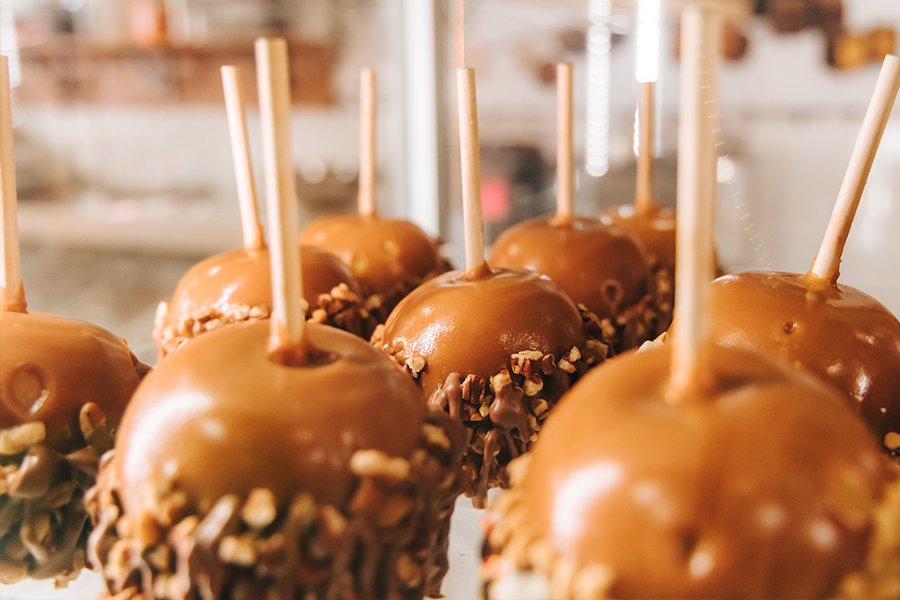
Answer first: Caramel Apples with a Build-Your-Own Topping Bar is a complete, flexible recipe built for home cooks who want clear quantities, visible doneness cues, and sensible make-ahead steps. Read the full method before starting, prepare every ingredient, and adjust flavour after tasting rather than relying on the old one-line teaser.
Recipe at a glance
| Yield | 8 apples |
|---|---|
| Time | 30 minutes plus setting |
| Main skill | Organize ingredients, follow sensory cues, and taste before final seasoning |
Ingredients
- 8 small, firm apples
- 8 sturdy food-safe sticks
- 14 ounces soft caramels
- 2 tablespoons milk or cream
- 1 1/2 cups toppings such as chopped nuts, toasted coconut, or crushed cookies
- Parchment paper and a little neutral oil
For Caramel Apples with a Build-Your-Own Topping Bar, ingredient brands and sizes can differ. Check labels for allergens, and keep the original packaging nearby when cooking for guests with dietary restrictions.
Step-by-step method
- Step 1: Wash the apples under running water and dry them thoroughly. Remove stems, insert sticks, and chill the apples while setting up toppings.
- Step 2: Line a tray with lightly oiled parchment. Place each topping in a separate shallow bowl.
- Step 3: Melt caramels with milk over low heat according to package directions, stirring until smooth. An adult should handle the pan and dipping.
- Step 4: Tilt the pan, dip one apple, and let excess caramel drip away. Roll in toppings before the surface sets, then place on the prepared tray.
- Step 5: Allow apples to set fully. For easier and safer eating, an adult can cut each apple into wedges immediately before serving.
How to get the texture and flavour right
- A dry, cool apple gives caramel a better surface. Moisture and waxy residue can cause sliding.
- Keep toppings small enough to adhere but avoid very hard pieces for young children or anyone with chewing difficulty.
- Caramel stays extremely hot and sticky after it looks smooth. Keep children away from the stove and let adults manage dipping and cutting.
For Caramel Apples with a Build-Your-Own Topping Bar, use the described appearance, aroma, and consistency together with the suggested time range. Cookware, appliance output, ingredient temperature, and batch size can all change the pace.
Serving and planning
Prepare serving dishes, garnishes, and heat-safe or food-safe utensils before the final step. When doubling Caramel Apples with a Build-Your-Own Topping Bar, use a vessel with enough room to stir or arrange the food evenly. A larger batch may need more time; do not simply double every cooking minute.
To build a menu around Caramel Apples with a Build-Your-Own Topping Bar, continue with Fruit 'N Nut Brie Tapas and Decorative Christmas Pancakes. These are recipe links, not product endorsements, and they give guests contrasting flavours and formats.
Scale the recipe with control
For a half batch of Caramel Apples with a Build-Your-Own Topping Bar, reduce every measured ingredient consistently and choose cookware that keeps a similar depth. For a double batch, prepare a written quantity list before opening packages. Taste-based ingredients such as sugar, salt, extract, or garnish should still be added gradually. Volume changes can alter heating and mixing, so watch the food rather than assuming the original timing will scale in a straight line.
If this is the first time serving Caramel Apples with a Build-Your-Own Topping Bar for guests, make the standard batch once before the event. Record the pan, appliance setting, ingredient brands, and actual time that worked in your kitchen. That small test makes later preparation more predictable without pretending that one result applies to every kitchen.
Storage and food-safety notes
While preparing Caramel Apples with a Build-Your-Own Topping Bar, keep raw ingredients separate from ready-to-eat garnishes, wash hands and work surfaces, and follow package directions for perishable ingredients. Cool leftovers promptly, transfer them to a covered container, and refrigerate. When reheating, warm only what will be served and discard food that has been held under uncertain conditions.
Source and related reading
For general handling, cooling, and storage context related to Caramel Apples with a Build-Your-Own Topping Bar, see USDA Food Safety Basics. Browse the Bake Everything home page for current store navigation.
Frequently asked questions
Why did the caramel slide off?
The apples may be damp, warm, or waxy, or the caramel may be too hot. Dry and chill the fruit, then let the caramel cool slightly before dipping.
How should caramel apples be stored?
Refrigerate finished apples in a covered container and serve within a short period for the best texture. Do not leave cut apples at room temperature.
Can children help?
Children can choose toppings and decorate cooled apples under supervision. Adults should cook the caramel, dip the apples, and use knives.
Final preparation checklist
- Read the complete Caramel Apples with a Build-Your-Own Topping Bar method.
- Measure ingredients before heating or mixing.
- Check allergen labels for every packaged ingredient.
- Use sensory cues as well as the time range.
- Keep hot cookware and sharp tools under adult control.
- Cool and refrigerate leftovers promptly.
This updated Caramel Apples with a Build-Your-Own Topping Bar guide replaces a thin legacy post with a recipe that can be followed from preparation through storage. Make one test batch as written, note the changes your ingredients or equipment require, and adjust the next batch deliberately.